
There were three techniques yesterday, but I only had the time to attempt two of them.
The first technique involved painting a pale colour wash on a piece of watercolour card and then applying a stencil until the paint was dry. Unfortunately I do not own any stencils yet (they are on my wish list), but I was determined not to let this deter me. I decided to try using an open embossing folder instead. I had no idea if this would actually work or not, but I was delighted to see that it had. I have to admit I was not overly excited by the result, but once I added a nice co-ordinating backing card, a satin ribbon, a tag, button and twine - oh and of course a bit of bling by way of a couple of co-ordinating sequins - I was actually over the moon with the end result. I would love to know what you think….


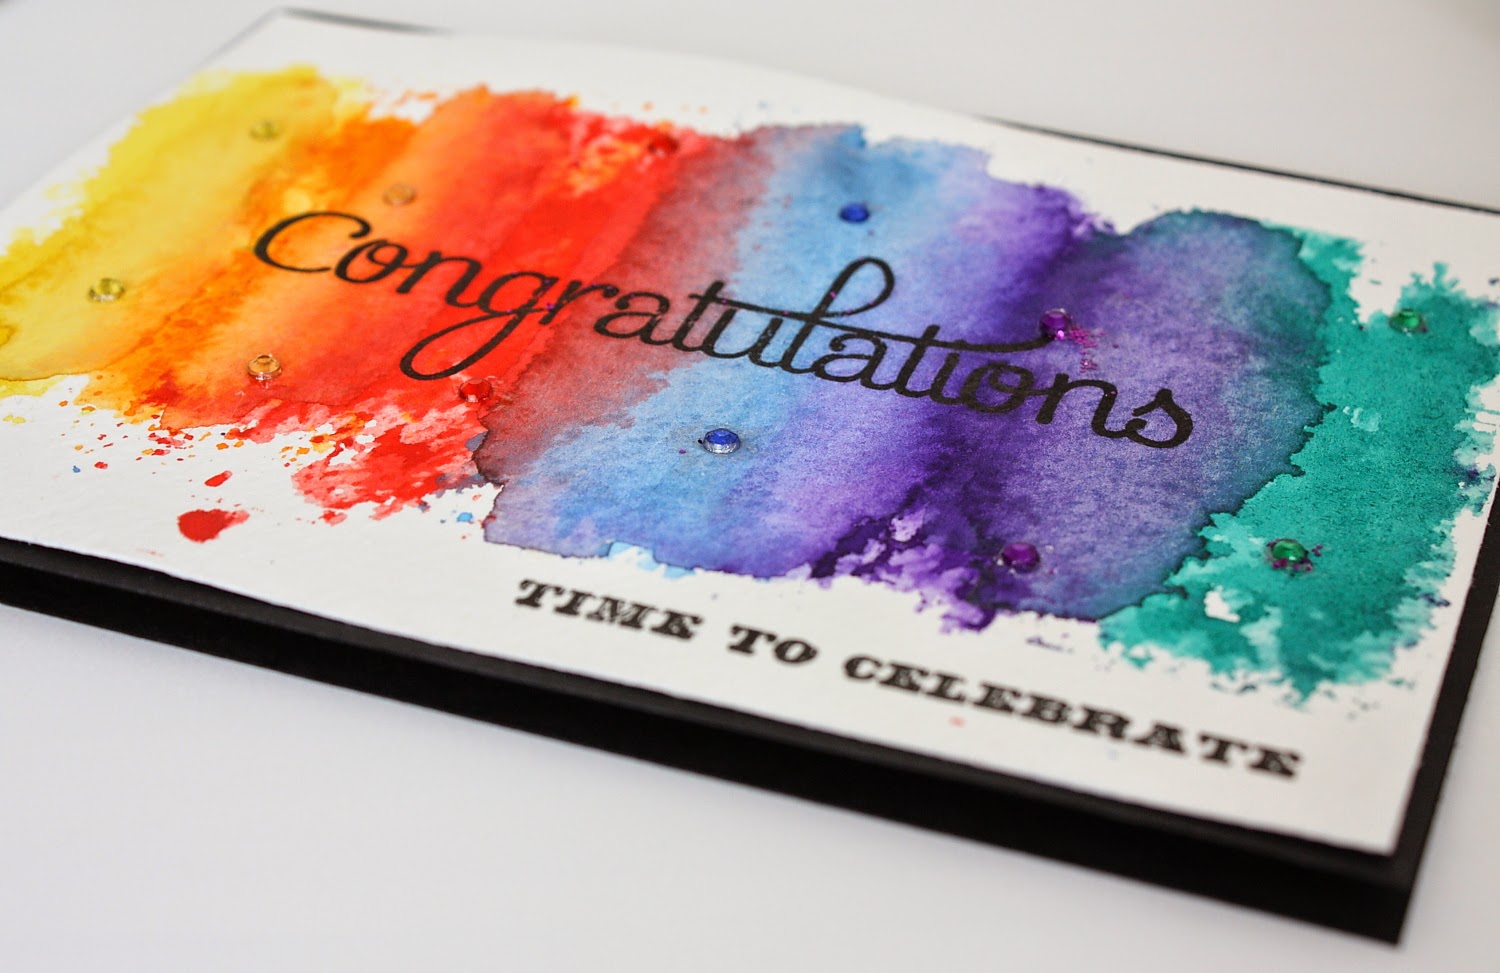
And now for the second technique - which again I didn't have the suggested resources for!! We were shown how to add some distress inks to an acrylic block, add some water and then stamp on to a piece of watercolour card. The process was repeated once the first layer had dried, first with the same colour and then working down the page, overlapping different colours. I decided to still try this technique, but since I didn't have distress inks, I just used watercolour paints.
Once the paint was completely dry, I added a black backing card, a couple of co-ordinating sentiments and of course-bling! I thought it would look great to add some crystals matching the colours of the watercolour paints. I am super happy with the end result!! I find the black backing card really brings out all the colours so much more. What do you think?


I can't wait for day two of the class being posted!! Any comments as always so very much appreciated xxx
WOW! Both cards are awesome! LOVE the first one! Well done, can't wait to see what you do tomorrow!
ReplyDeleteWOW, WOW and WOW, Laura! A+++ on your first two projects here! Applause for your ingenuity in adapting with the embossing folder! Brilliant and so pretty; the 'extras' you added to complete the card just add to the initial impact! Impressive! Your second is pure delight; fun colours and seriously - this is the result of an acrylic block blobbed up with ink and water, than stamped? Dazzling!! Love the sentiment stamped across the front and your bits of sparkle add extra punch! Straight to the head of the class, Laura! Awesome! Excited to see what works of art you'll have on display tomorrow!! Hugs~c
ReplyDeleteSuper card! Love the colors. I tried this one...may take some practice for me! Love the black backing card and sentiments. Really pops the color. TFS.
ReplyDeleteThese are both lovely Laura. I really love the rainbow card :)
ReplyDeleteLizy xx