
The first technique was to stamp and image in black ink, cover with rubber cement, paint a water-colour background while the rubber cement would repel the paint, thus keeping the image paint free. The rubber cement would then rub off once finished. Again, I did not have any rubber cement, so I decided to try another technique which luckily worked just as well!! I stamped my image and heat embossed with black EP. I then stamped another copy of the image on scrap card and cut it out in order to create a mask. We were told that masks were fine, but some of the paint could seep underneath. I figured though that perhaps the EP would prevent this???? There was only one way to find out. I stuck my mask over with a few bits of double sided tape and then used three complimentary shades of watercolours to paint a square around the image. I left it to dry and then got to remove the mask to see if it had worked…..voila!!


A simple sentiment then added using white EP on black card and the card is finished. I ADORE this card!!!!!!!!!!
Card 2 - This time, we were shown how to use water-colour pencils. Lines were drawn horizontally in 3 different colours of pencils and then once water was added, these turned in to watercolours. I don't have these pencils and so went straight for the watercolour paints instead. Once these were blended to create a background, we were then shown how make it look like there were flecks of black paint on. This was done by drawing small circles with the watercolour pencils and then adding water to the spots….Again, I just went to the paints and actually created real flecks of paint. I added a sentiment stamped on a die cut to the card ( I wound some thread behind it as per the designs we were shown), added some bling by way of sequins and then added a skeleton silver leave just to add a bit of something special. Really like this card too. My Husband says it is very different for me and a bit 'quirky'……quirky is good though I think??!


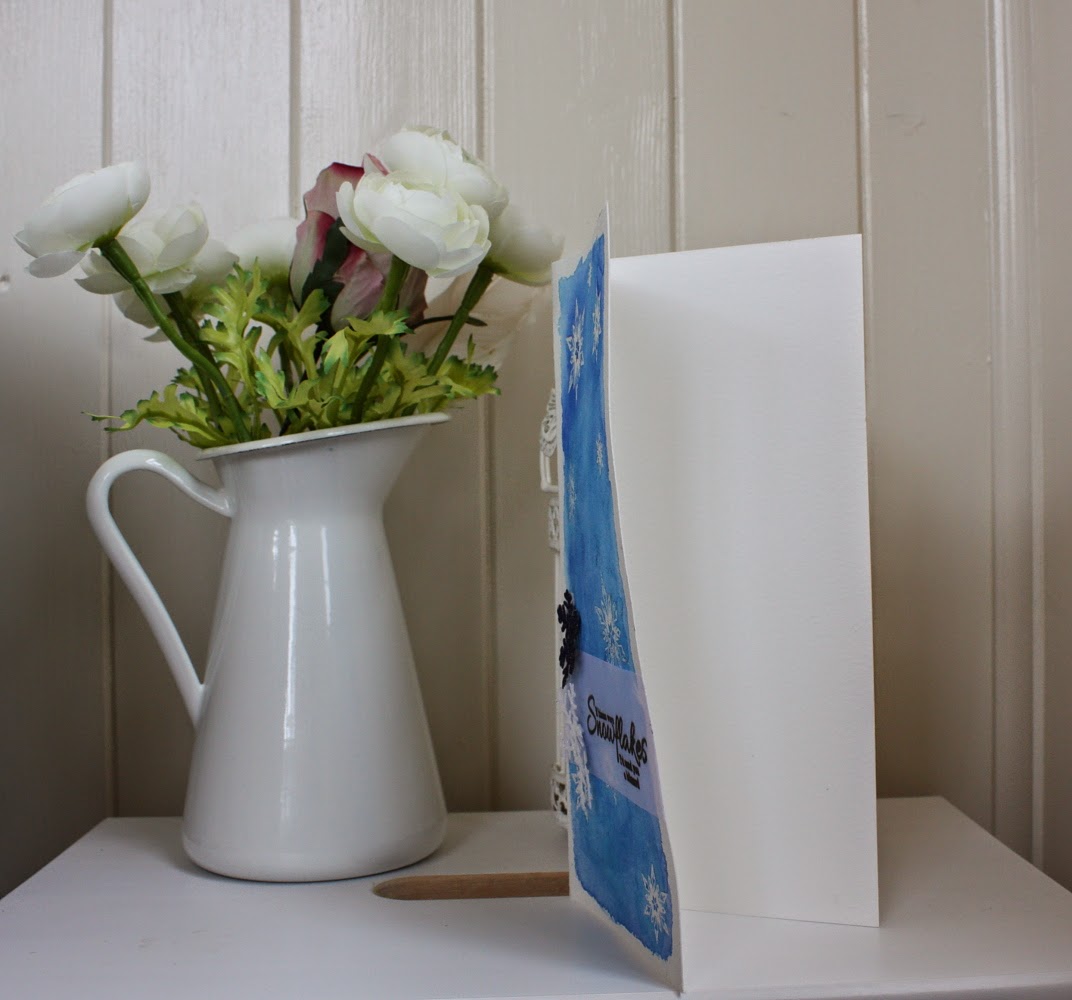
Finally, card 3. We were shown how to stamp images on a card and heat emboss with clear EP. We then painted over the top with watercolours (the EP repels the paint) and then once dry, the EP was ironed off in order to leave the stamped images as 'bare card'….This was such fun to do - a lot of effort but fun. As soon as I saw this technique, I knew I just had to use the Stunning Snowflakes collection by Uniko Studio. I added a sentiment from the same set on vellum, and finished off with two die cut snowflakes - one cut directly from some blue glitter paper I had and the other diet cut from card that had strips of double sided tape attached and then dipped in white glitter …..can you tell this is one of my favourite techniques to do just now??!!! Now whilst I do love this card, I have issues with it. The first is that my card had warped whilst heating it with my heat gun…..this is a constant problem I am having - does anyone have ideas of how to stop this happening. I get it REALLY bad when heating vellum. The second problem is the ink used for the sentiment just won't dry. I actually had to do this strip twice as the first all smudged. I used versafine ink, but on reflection, black EP would have been better.


 - see?? Totally warped :-(
Any comments as always so very much appreciated.
I apologise for the very too the point post - got 101 things to do but was desperate to share my day's efforts with you all :-) xxx
awesome job on all the cards!! I really like the butterfly one...great colours
ReplyDeleteA trio of lovely cards, Laura, and again, I'm applauding your ingenuity! Your embossed butterfly is stunning on the water-colour background, working in harmony highlight one another. Your husband's description of your second card as quirky is 100% accurate; quirky in the best of ways! The background again, is eye-catching and your focal images are perfect! Fabulous! Snowflakes against your gorgeous blue background means your third card is also a knock-out! Pretty, delicate, soft...I'm reminding of wintry evenings of gently falling snow (like yesterday *grin*). Once again, top-notch cards, my friend! I think you and water-colouring are made for each other (and your Grandpa thinks so too!!) Hugs~c
ReplyDeletePicked your card from the gallery just to get a closer look....beautiful, I echo the sentiments above and I like that you suggest what to use if you don't have the exact materials. Also, about the warping, with a heat tool warm the back of the card too while you are embossing the front. I saw this tip on a youtube tutorial about card making...it might have been one of the instructors for our watercolors class. Thanks for the great inspiration!
ReplyDelete